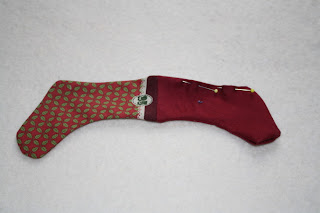
My apologies for posting this without a finished picture but I haven't got my camera with me, sorry
Requirements:
1 x Northcott's 'Stocking Stuffer' panel
60 cm (24") x lining fabric (I used a solid maroon colour)
3.2 m (3.25 yds) x 3 mm (1/8") ribbon
1 x reel thread - Gutermann natural cotton shade 2433
Bunting tape
25 x Mini pegs
Sweets or chocolates to fill the stockings
To Make up:
1 Press the Panel and the lining fabric.2 With the lining fabric rs(right side) down, place the stocking panel on top ws(wrong side) down. Pin.
3 Cut out all the stockings on the marked dotted line cutting through both the panel and the lining fabric, keep matching backs and fronts together.
4 Cut the ribbon into 25 x 4.5 inch lengths
5 With rs together pin a stocking front to its lining, also pin a stocking back to its lining.
6 Stitch, with stocking facing up, on the marked line of the stocking.
8 Fold one piece of ribbon in half and pin (with the loop towards the inside) to the stocking back close to the seam. Take care when sewing not to catch the folded ribbon in the stitching at the other side. Sorry I have no picture of this step, in my enthusiasm I forgot to do it and its hard work sewing the ribbon on after you have made the stockings!
9 With rs together pin stocking front & lining to stocking back and lining back & lining. If you pressed one seam to the lining and one to the stocking they should lock nicely together where the front and back meet.
10 Stitch, stitching the ribbon loop in place at the same time, leave an opening for turning in the lining between the heel and the top. NB stitch along the line on the stocking, use a seam allowance of approximately 3/8" for the lining. The lining will 'sit' better in the stocking if it is slightly smaller.
11 At this point you need to clip the curves, something which I find quite tedious. Instead I used pinking shears to trim all round except the opening.
12 Turn right side out, gently push out the toe and heel - if you have pinked around there is no need to poke these out with a knitting needle or similar, just the pressure of your finger will work. also if you use a needle there's a chance you will poke too far and create a hole. Ask me how I know! There is no need to poke out the toe of the lining just push it through, but do make sure to keep it back when sewing the opening closed.
13 Fold the raw edges to the inside of the opening pin and stitch, by hand or machine.
15 Put a chocolate or sweet in each stocking and peg to the bunting tape.
16 Enjoy
Happy stitching,
Julie
All words and pictures are ©Julie Lawrenson-Wood and The Quilted Sheep, please do not copy without first asking permission. Thank you.


1 comment:
I like the stockings you made!
Post a Comment