
So many people come in the shop and admire our soft
books, and want to know how we make them. Since Julie has added a couple of extra touches to the included instructions, we've written this tutorial to show you how we do it:
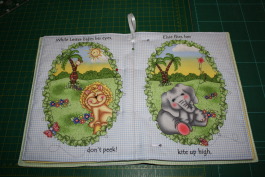
For the tutorial we shall be using 'A Bazooples Day' by Vivki Schreiner.

Requirements:
1 x soft book panel
30 cm (12") wadding
20 cm (8") ribbon (optional)
Abreviations rs - right side of fabric, ws wrong side of fabric
NB wadding and batting are the same thing
For the tutorial we shall be using 'A Bazooples Day' by Vivki Schreiner.
Requirements:
1 x soft book panel
30 cm (12") wadding
20 cm (8") ribbon (optional)
Abreviations rs - right side of fabric, ws wrong side of fabric
NB wadding and batting are the same thing
1.
Press the fabric panel
2.
Cut the pages on the outer edge or
dotted line as instructed on the panel
3. Write the page numbers on scraps of paper and pin them to the top left corner of each page (on the rs of the fabric); this will make your life easier when putting the book together. You will note that I missed out this step, I forgot it!
3. Write the page numbers on scraps of paper and pin them to the top left corner of each page (on the rs of the fabric); this will make your life easier when putting the book together. You will note that I missed out this step, I forgot it!
4.
Roughly cut pieces of
wadding ½” to 1” larger on all sides – beware the cover pages are
usually slightly larger.
5.
Lay the wadding for the book cover on the table, place the front/back cover on top ws down. Making sure it
is the correct way up, place the inside front/back cover on top rs together.
Smooth everything out and pin through all 3 layers.


Pinned ready to sew

Pivot at the corners

Trimming back the wadding

Wadding trimmed
8.
Clip corners, not too close!

9.
Turn rightside out gently poke out
the corners and edges using a knitting needle or something similar. Careful
here its easy to poke through the corner if you get a bit heavy handed!

Corners clipped

Ready to press
10.
To remove the creases, very gently
glide the iron over each page, don’t put the full weight of the iron down, just
let it gently hover on the fabric keeping the weight of it in your hand. Don’t
plonk the full weight of the iron down or you could end up with something
resembling a board book!
11.
Pin the opening closed, you could
at this stage whip stitch the opening closed but I don’t bother.

Pinned ready to stitch
12.
To finish the edges of the book
neatly and to help keep the wadding in place top stitch about 1/8” away from
the edges. Start and finish along the bottom edge as it will be less obvious
there.

Top-stitching has the added bonus of closing up the opening. You could also sew another row of top-stitching about 1/8” away from the first.

Top-stitching
Top-stitching completed
13.
Repeat with the other pages sewing together following manufacturers instructions, in this case sew pages 1 & 8 to 2
& 7, and pages 3 & 6 to 4 & 5.
14.
Assembling the book. At this point
it is useful if you have remembered to number your pages at the start. If not
you are going to have read it and ensure it makes sense before you stitch it
all together.
15.
Lay the front/back cover on the
table, center pages 1/8 2/7 on top, with pages 1/8 down, put the final pages on top, pages 3/6 down, You
should have pages 4 & 5 facing up.
Pinned ready to stitch
16.
Using erasable
marker or chalk, mark a line down the centre between pages 4 & 5.
17.
Pin through all layers, pining in
opposite directions, as this will ensure the least movement. I also like to add
a small piece of ribbon at this point for hanging purposes. Lay the folded ribbon on the centre line and
pin in place.
18.
Using a walking foot stitch the
book together taking a few back stitches at the beginning and end.

All stitched up
That’s all there is to making a soft book from a panel.

Hope you enjoyed this tutorial
and please leave comments and ask questions you have.
Please feel free to link to this tutorial,
all we ask is that you let us know you have linked to it.
All words and pictures are ©Julie
Lawrenson-Wood and The Quilted Sheep, please do not copy without first asking
permission. Thank you.

No comments:
Post a Comment